![]()
![]()

Easter is all about sweets! As a chef, it’s important to stay up to date with all the latest food trends and incorporate holiday inspired dishes into your restaurant menu. In this blog, we are going to share some Japanese inspired Easter desserts.
Shaped like a baby chick, this is a perfect Eater dessert originating in Fukoka in 1912.
1. Before making the dough, scoop out 12 spoons of red bean paste, roll them into balls and let harden in the freezer for 30 minutes.
2. Mix egg yolk, Honteri, and milk in a bowl. Add flour, baking powder, salt, and knead until a soft dough has formed. Cover the bowl and refrigerate for 30 minutes.
3. Once done, divide dough into 12 pieces, roll each piece into a ball and press flat to create a round shape, big enough to be wrapped around the red bean paste ball. Once the paste has been covered with the dough, thaw to ensure quick and easy shaping.
4. Roll each bun in your hand creating a cylindrical shape. Squeeze one end to form the neck of the chick and shape the face and length however you like.
5. Bake the dessert at 300C for 15 minutes. Once golden brown, remove from oven, decorate the chicks, and serve. Eyes and wings can be created by using a heated steel chopstick or skewer.
This dessert consists of edible gems or rocks that are jelly on the inside and crystalised sugar on the outside.
1. Dissolve Agar Agar into water and bring to boil. Add sugar and let the mixture boil for a further 2-3 minutes.
2. Take the mixture off the heat and add flavouring. Pour into an oiled container, add a few drops of food colouring and swirl together.
3. Refrigerate the mixture for a few hours. Once set, pull it out of the container and cut into 1 inch crystal shapes. You can serve them fresh without the formation of crystal on the exterior or wait for 24 hours for the sugar to crystalise.
A great vegan option, this matcha chocolate egg consists of a matcha mousse filled in a thick chocolate shell, draped in white matcha chocolate.
Melt all your ingredients in a bain marie, on low heat. Once melted, leave the mixture to cool until its slightly thickened and pour into the egg moulds.
1. Fill the mould fully without overflowing. However, if it overflows, ensure to scrape away all the excess chocolate. Carefully place the mould in the freezer for 10-15 minutes to create 1cm thick chocolate.
2. Carefully remove the moulds from the freezer, turn the moulds upside down and let the remaining chocolate drip in a bowl. Once emptied, check the thickness of the hardened chocolate. If it’s too thin, add the chocolate again and freeze for another 20 minutes – or if it’s too thick, scrape the excess off.
3. Once you’re happy with the thickness, place the moulds in the fridge.
1. Blend all ingredients in a high-speed blender. Remove egg moulds from the fridge and pour the mousse in them until almost full. Place them back into the fridge for 3 hours, to set the mousse.
2. Melt all the excess chocolate that was poured from the shells and add it into a piping bag. Take out the moulds from the fridge and carefully remove the chocolate eggshells – once fully out, place half back into the mould.
3. Start piping around the outer rings of both shells with the melted chocolate and quickly and firmly close them together. Cover again with mould and place in the freezer for 5 minutes.
1. Melt all ingredients on low heat, in a bain marie. Mix in matcha powder and transfer the mixture into a silicone pouring jug. Once cooled at room temperature, remove the egg from the freezer, place it on top of a mason jar and pour the matcha chocolate on top to create drips, from a 30cm height. Once done, your matcha chocolate egg is ready to be served.
We hope you enjoyed learning about Easter dessert recipes inspired by Japanese cuisine. Replicate the dishes with Mizkan Chef’s specially crafted ingredients to add an extra touch of flavour to them. Sign up to our newsletter for all the latest news and updates within the Japanese food service industry and check out our chef recipes page for more Japanese and fusion cuisine inspiration.
Just like the rest of the world, Mother’s Day has become a popular and commercialised holiday in Japan with children taking their mothers out for a meal, showering them with flowers and gifts.
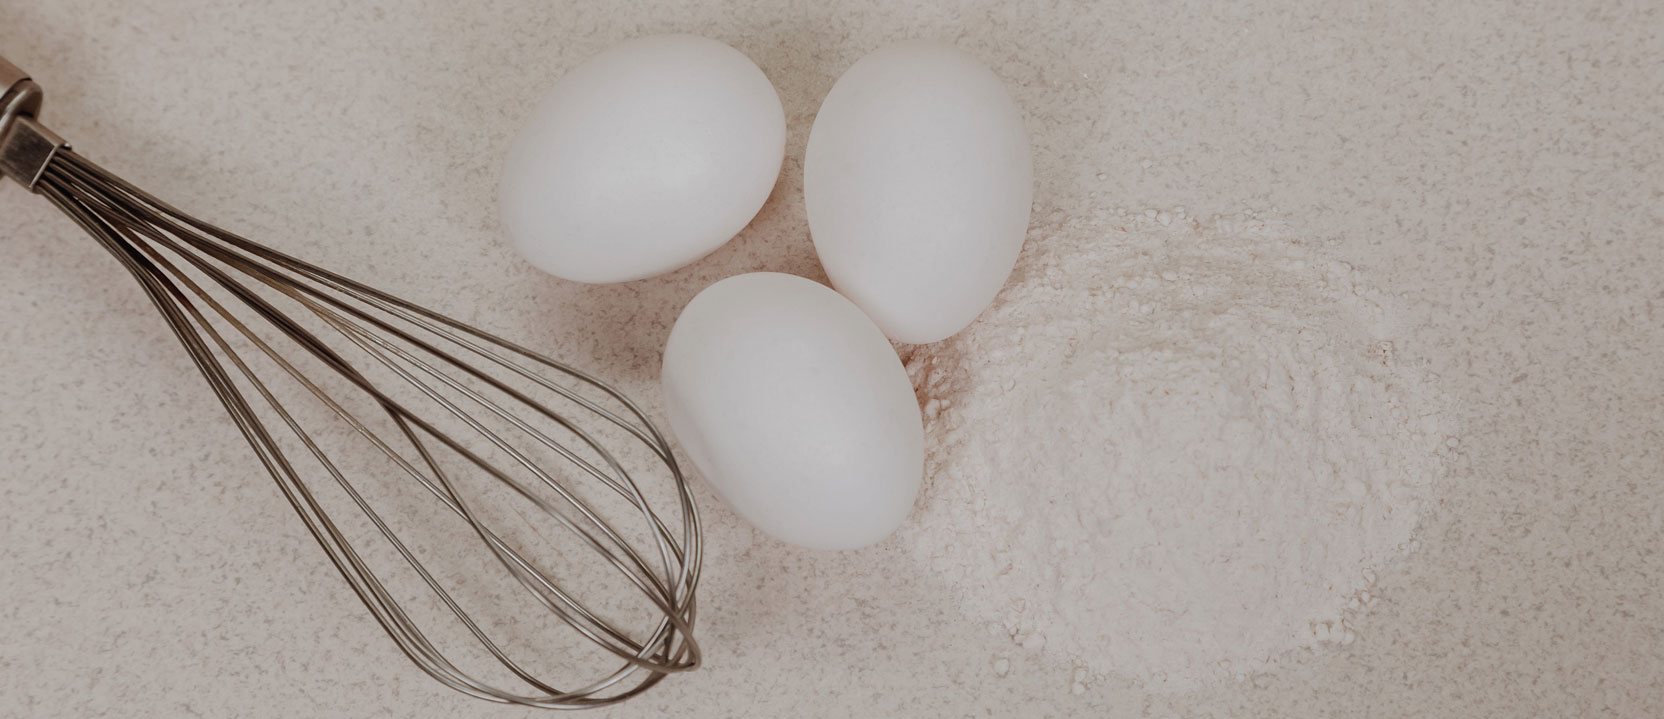
However, there’s one thing that makes the Japanese Mother’s Day experience different, and that is the day’s association with eggs. Egg dishes are popular on this day in Japan as they are regarded as a symbol of nurturing, just like a mother.
So why not create egg-based recipes for your restaurant’s Mother’s Day menu?
Chawanmushi is a delicate and savoury steamed egg custard served in a cup. This smooth and silky dish can be served both hot and cold.
Oyakodon is an umami-rich chicken and egg dish served on top of rice. The word ‘Oyakodon’ means parent and child rice bowl, making it a perfect dish for Mother’s Day.
Top off your Mother’s Day menu with the popular Japanese Purin. This creamy egg-based dessert is rich in flavour and silky in texture.
Caramel sauce:
Custard base:
Equipment:
We hope you enjoyed our egg-based recipes, made specifically for Mother’s Day. Let your customers experience the day in a Japanese style by incorporating these dishes into your restaurant’s Mother’s Day menu. Check out our Honteri page for more information on this high-quality mirin-style seasoning, and don’t forget to sign up to our newsletter for all the latest news and updates within the Japanese foodservice industry.
Since the 14th February is one of the most popular days of the year for a romantic evening meal, why not prepare your restaurant to serve the best Japanese dishes as part of your Valentine’s Day dinner menu.
Use Mizkan Chef’s specially crafted ingredients to add an extra touch of flavour that customers will surely remember. Let’s get started…
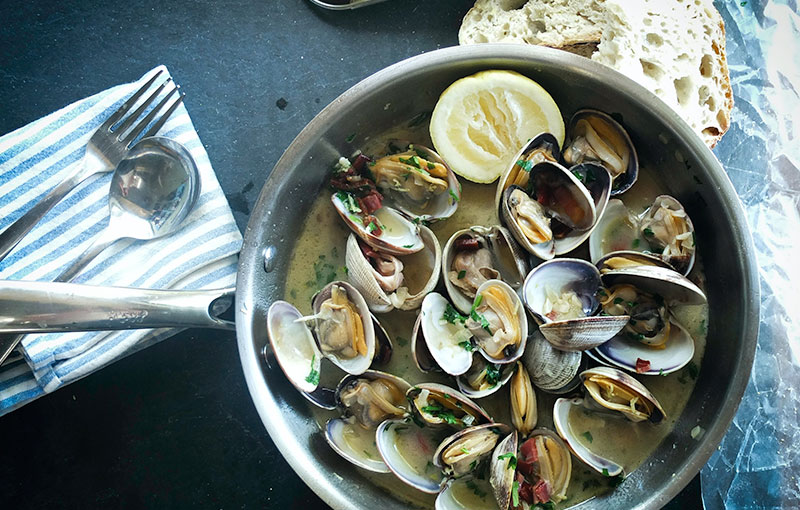
Let’s start with an extremely easy to make appetizer common in izakaya (Japanese bars) – sake steamed clams. This dish takes around 10 minutes to make and only requires a handful of ingredients.
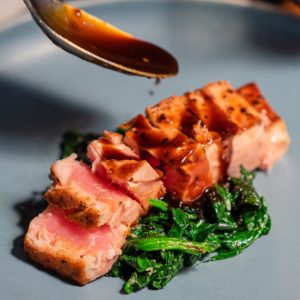
This classic Japanese seafood dish melts in your mouth, perfect for a romantic dinner. The secret behind the deliciousness is the miso sauce, which is prepared days in advance.
Miso marinade:
This step is required to be completed 2-3 days in advance, to ensure best results.
Cooking the fish:

In Japan, Honmei chocolates are a Valentine’s Day speciality used to express love to those you’re romantically involved with. Incorporate this into your menu to capture the true essence of a Japanese Valentine’s Day.
We hope our blog has been helpful in sparking some inspiration for your Valentine’s Day dinner menu for your restaurant. For further information on Mizkan Chef’s specially-crafted products such as Honteri, check out our products page. Alternatively, sign up to our newsletter for all the latest news, recipes, and updates relating to Japanese cuisin
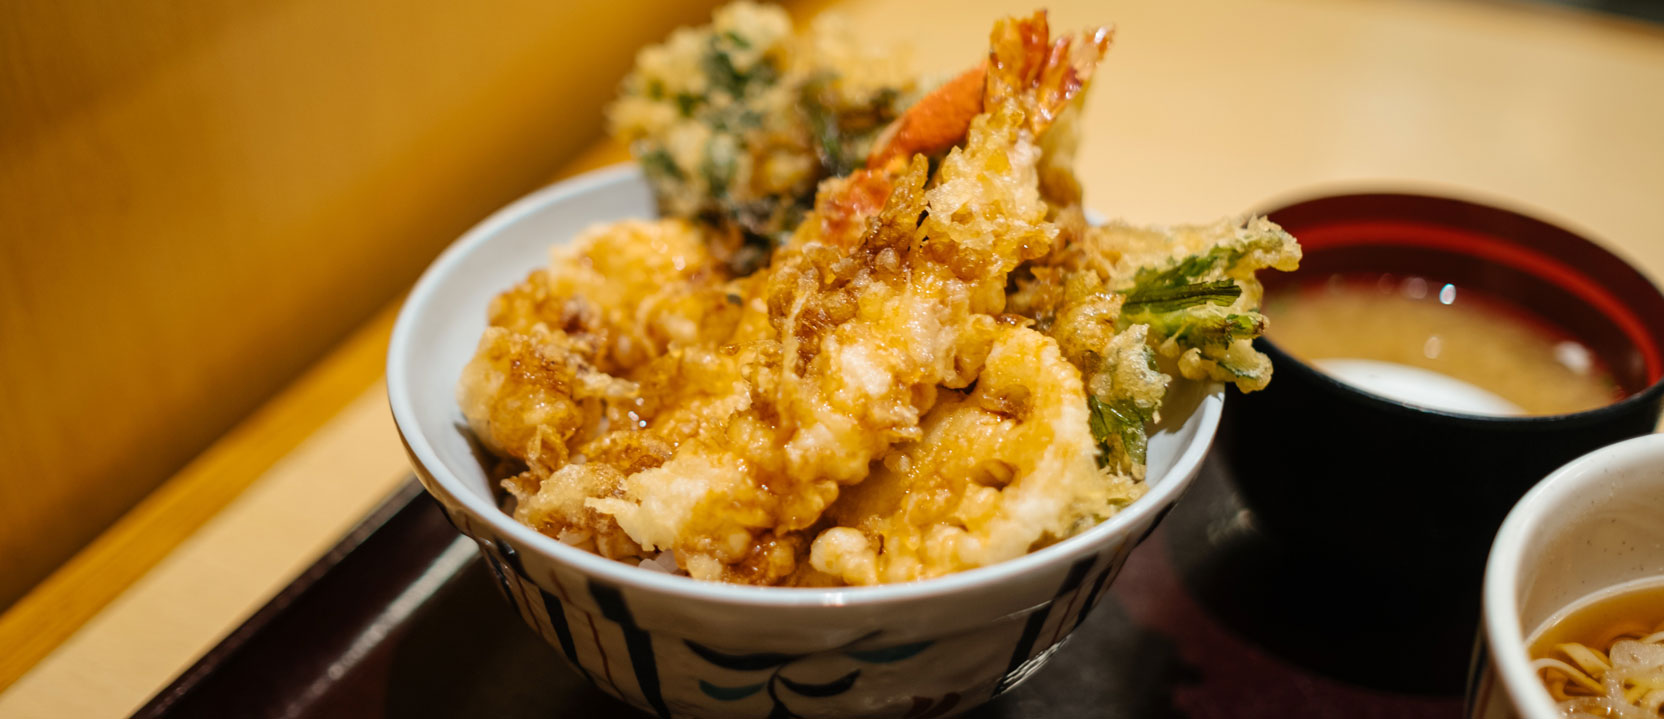
Tempura is a simple Japanese dish that consists of seafood, vegetables or chicken being lightly battered and deep fried to create a crisp coating around it. This cooking technique was first introduced in the 16th century in Japan and chefs often spend years perfecting it.
The dish can be served on its own as a starter, or added to other dishes such as tempura soba, tempura udon, and tempura sushi.
The main ingredient that makes tempura the dish it is today, is the tempura batter made of only a few simple ingredients that we’ll discuss later on. You can either make the batter from scratch or buy it pre-made. However, we would recommend creating your own for a fresher taste.
Let’s find out how to make tempura batter that can go well with vegetables, seafood, and meat. For best results, make sure the ingredient is in the right consistency.
You can use any vegetable or seafood for a tempura dish. However, there are certain foods that are more common than others as they pair well with the batter – let’s learn about the most common types of tempura dishes that you can serve in your restaurant.
Prawn tempura is the original, most common tempura consumed within Japanese cuisine. The seafood used in the dish is mainly raw shrimp. In order to prevent the shrimp from curling, the head is removed, and the shrimp is cut in half.
Vegetable tempura is also another very common tempura dish. A wide range of vegetables can be used to make this dish, such as potatoes, onions, mushrooms, eggplants, and peppers. Whether you want to use a single vegetable or mix them together before battering them, vegetable tempura is very versatile.
This is the least common type of tempura, only popular in the Oita region of Japan. This tempura can become a little heavy once fried. However, to prevent the heaviness, chefs use thin strips of chicken breast.
We hope our guide has been helpful in explaining what tempura is and how you can make it for your own restaurant. For information on how to purchase our Honteri mirin-style sweet seasoning, get in touch with our customer care team. Feel free to also check out our blog for similar guides and Japanese recipes, and lastly, feel free to sign up to our newsletter for all the latest news and updates within the Japanese food service industry.
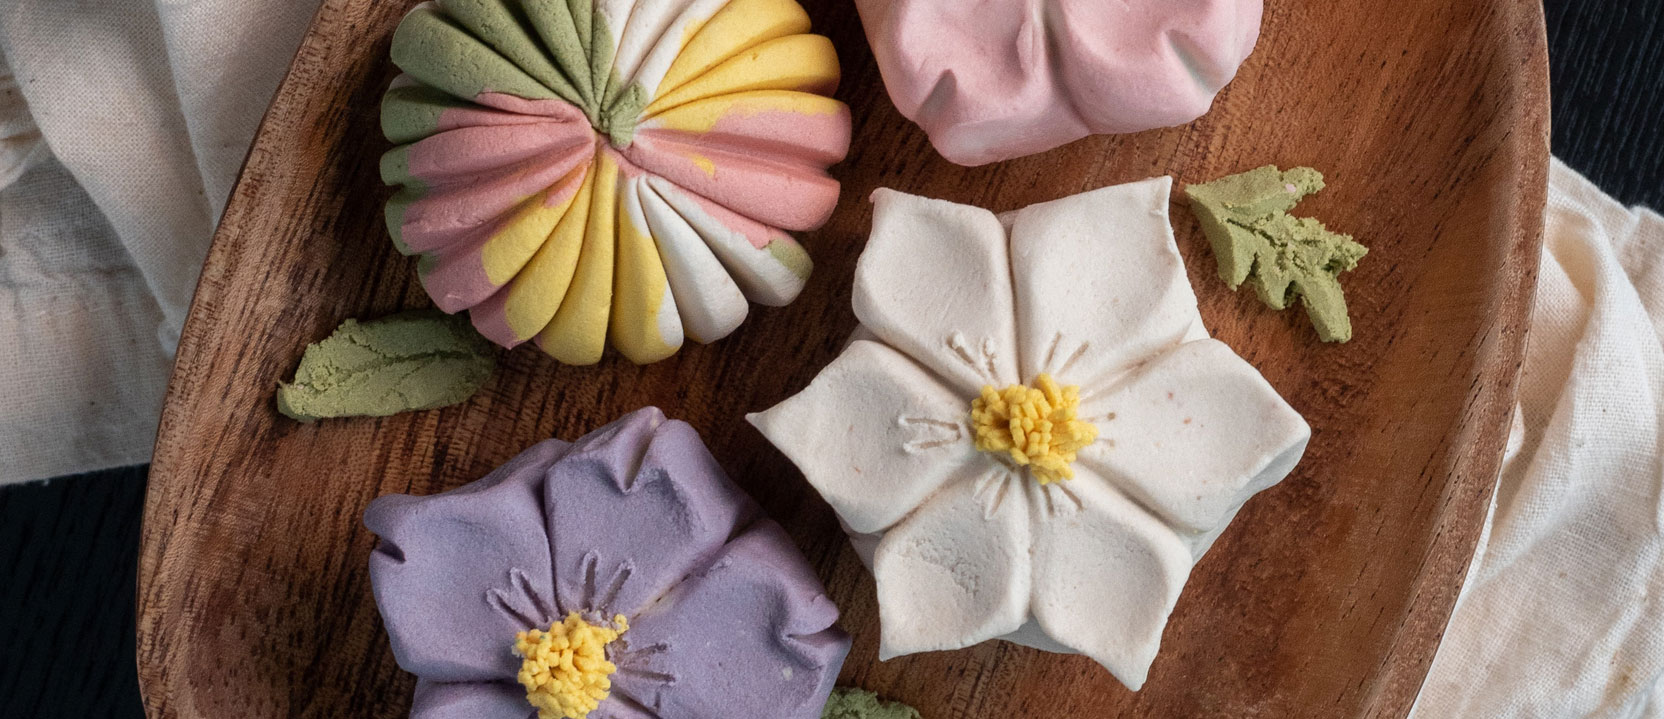
Although Japanese cuisine is known for its savoury food such as sushi and noodles, Japanese desserts are also starting to make the rounds across the world.
Let’s explore a mixture of fusion and traditional Japanese desserts that you can incorporate into your restaurant menu.
Let’s begin with a traditionally French dessert, the crepe! The Japanese have added their own touch to it by creating matcha green tea flavoured crepes, layered on top of each other with fresh whipped cream in between.
Mizu Yokan is an easy Japanese dessert that is perfect to serve after a heavy meal. Although this jelly-based dessert is typically eaten in summer, there is nothing stopping you from incorporating it in your restaurant menu all year round.
Mitarashi dango is a very popular Japanese dessert. Made with sweetened rice balls and covered with sweet soy sauce glaze, this dessert is perfect for incorporating into a traditional Japanese menu.
Ingredients for Sweet Soy Glaze:
Now that you know some popular Japanese dessert recipes, we hope you can incorporate them into your restaurant menu and wow your customers. For information on how and where to purchase Honteri Mirin, please get in touch with our expert team.
Dashi is an essential part of many Japanese dishes. Unlike soup stock from other cuisines, dashi is only made from two ingredients and takes around 10 minutes to make.
This blogpost will explain what dashi is, the different types of dashi stock, how they’re used in Japanese cuisine and how chefs can incorporate them into their recipes to add an extra depth of flavour to any Japanese or fusion dish.
Dashi is a Japanese soup stock that is typically made of fish such as dried bonito flakes or sardines, kombu, dried shiitake mushrooms, or a combination of both vegan/vegetarian and seafood ingredients.
The soup stock adds an extra depth of favour to dishes, known as umami. Let’s explore the different types of dashi stock:
Below is a list of dishes containing dashi stock that you can incorporate in your restaurant meals:
You may ask, what is dashi made of? Below are recipes of different types of dashi.
We hope our guide to dashi has been of help. Use any of the above dashi stocks to create a base flavour for your restaurant dishes. If you feel extra creative, try combining some of the ingredients and share the outcome with us.
Don’t forget to sign up to our newsletter if you’re interested in receiving all the latest news, updates and recipes related to the Japanese foodservice industry.
With World Sandwich Day on the horizon, we’ve put together some popular Japanese sandwich recipes that are loved by foodies across the world.
Whether you’re a chef at a Japanese or fusion restaurant, replicate these recipes or use them as an inspiration for creating your own sandwiches.
Katsu! You’ve probably heard of this Japanese food plenty of times before; surprisingly, it can also be used in sandwiches.
The Katsu Sando consists of crispy pork or chicken cutlets (which we’ll be discussing today) sandwiched between Japanese style milk bread. The cutlets can be deep-fried or baked.
1. Mix breadcrumbs and 1 ½ tbsp oil. Toast on medium heat until dark brown.
2. Add ½ tbsp oil into the egg and whisk together.
3. Pre-heat oil for deep-frying or oven to 200 C (400 F).
4. Make slits on the tissue connecting the meat and the fat.
5. Mould the meat and bring back to its original shape. Add Shiragiku, salt and pepper.
6. Dip the meat into flour, egg mixture and breadcrumbs. Deep fry or oven bake.
7. Spread butter on all bread slices, add tonkatsu sauce, cabbage, and cooked cutlet on one slice, cover with the other and add plate to press things into place.
8. Cut the crust and serve.
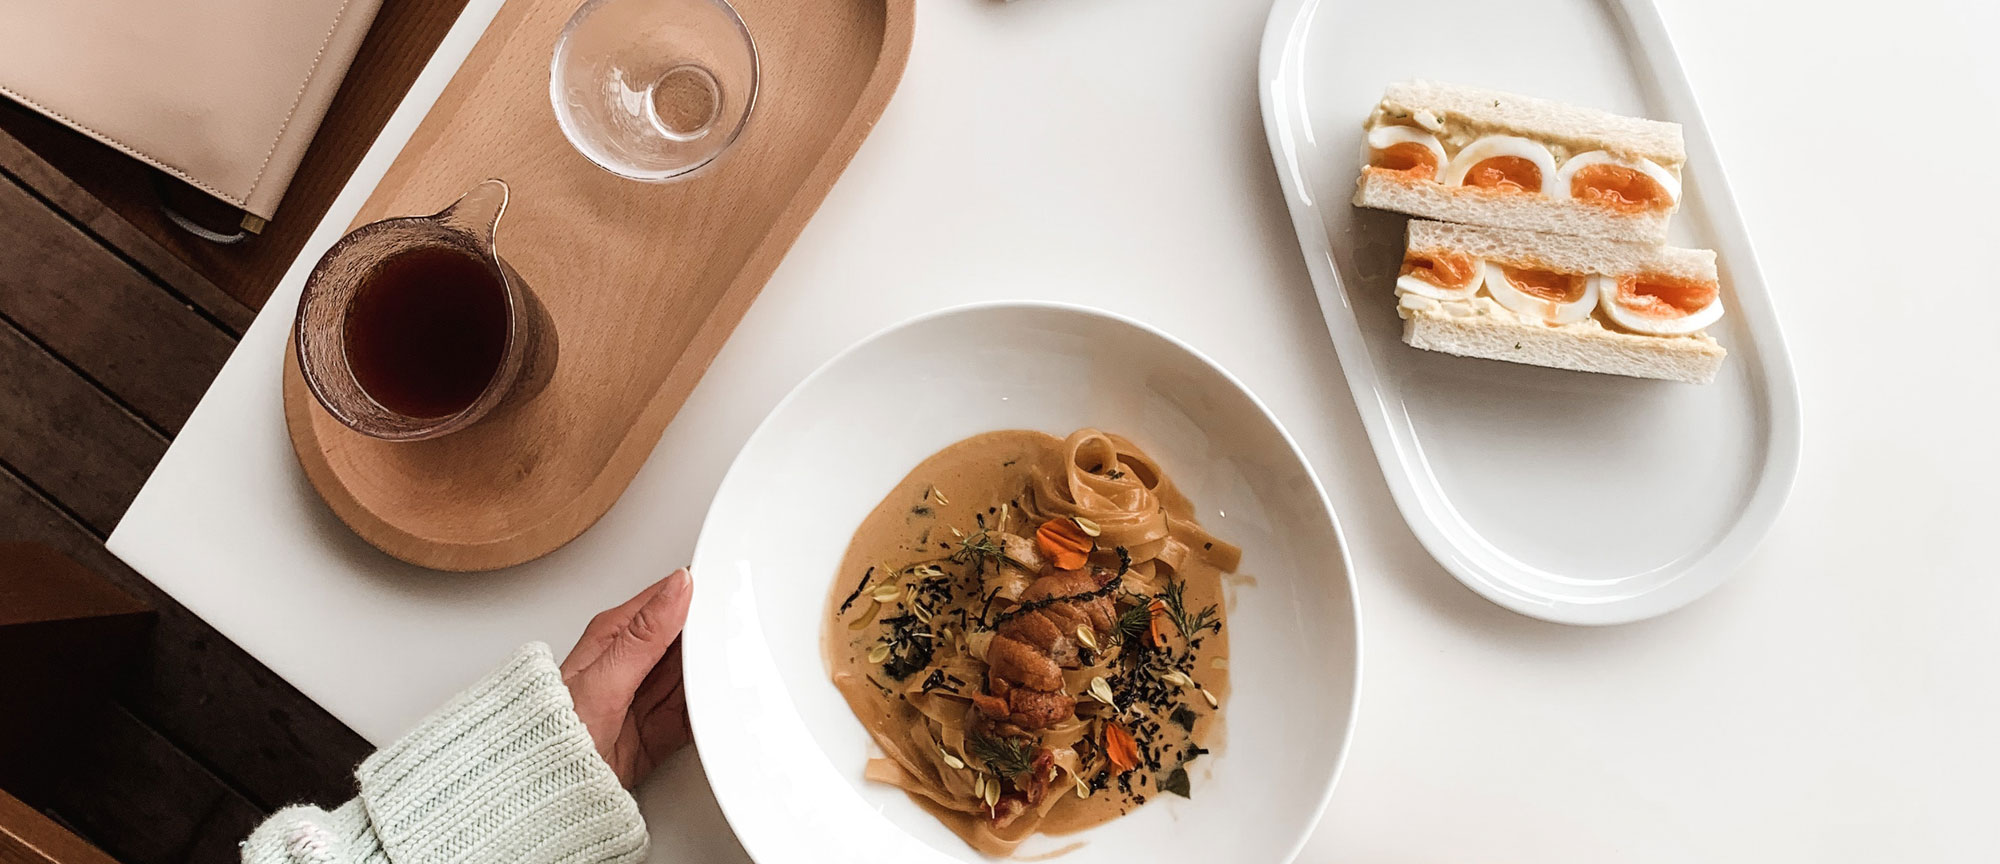
Also known as Tamago Sando, the Japanese Egg Sandwich is regarded as a convenience food, but there’s no harm in incorporating it into your restaurant menu and perhaps adding your own touch to it.
The sandwich is popular across the world due to plain eggs going so well with the milky and sweet Japanese bread.
1. Boil eggs on medium heat, cook for 12 minutes and transfer to cold water to peel shells.
2. Mash peeled eggs and mix sugar, salt, milk, and mayo.
3. Spread butter on all bread slices. Evenly distribute the egg salad on one slice. Cover with the other and add plate to press things into place.
4. Cut the bread crusts and serve.
A Japanese fruit sandwich is unlike any other, consisting of whipped cream and seasonal fruits being tucked between bread slices – served for breakfast, lunch or dinner.
Add a touch of unconventionality and colour to your restaurant by incorporating the dish in your menu.
1. Symmetrically cut fruits into equal parts and remove moisture using a paper towel.
2. Add heavy whipping cream and sugar into a bowl and start whisking until cream is thickened to the right consistency.
3. Spread the whipped cream on all bread slices and diagonally align all fruits.
4. Add more whipped cream between fruits and cover with another slice.
5. Tightly wrap the sandwiches with cling film and refrigerate overnight.
6. Remove cling film and cut the sandwich in half, diagonally. Remove the crust and serve immediately.
As you may have gathered, there’s no denying that Japanese Sandwiches are an art form. Incorporate them into your restaurant menus on World Sandwich Day and watch your customers fall in love with them.
Sign up to our newsletter to be informed of new recipes for your restaurants as well as learning about the latest trends dominating the Japanese foodservice industry.
You can also get in touch with us here for information on our Japanese vinegars and seasoning.
How to Make Teriyaki Sauce?
A staple in Japanese cooking, teriyaki sauce is an easy-to-make versatile sauce that can be used to elevate the flavours of almost any dish.
The sauce can also be found in supermarkets; however, the fresh authentic version will have a much better taste, with no preservatives that are often found in bottled sauces.
So, let’s learn how to make teriyaki sauce.
What is Teriyaki Sauce?
Teriyaki sauce is considered as a fundamental Japanese marinade and seasoning invented by Japanese chefs in the 17th century. It’s traditionally made by mixing and heating soy sauce, mirin and sake.
But let’s explain what teriyaki means. Teriyaki is made up of two Japanese words, ‘teri’ which refers to the shine on the food given by the sugar in the mirin and ‘yaki’ which is the food preparation method referring to grilling, broiling, or pan-frying.
So, in general, teriyaki is a Japanese cooking technique, referring to meat being marinated in teriyaki sauce and then broiled or grilled – rather than the sauce itself.
Apart from being used as a marinade, it can also be served as a dipping sauce or poured over the meat once it’s been cooked.
The traditional homemade teriyaki sauce is a thin mixture, but it can also be thickened to be used for dipping. Whereas, store-bought bottled varieties are thicker and may not taste as good as the fresh version.
Teriyaki Sauce Recipe
The traditional Japanese teriyaki sauce contains five main ingredients. However, non-traditional versions contain additional ingredients. You should adjust your ingredients based on your taste and whether you want a Japanese or westernised teriyaki sauce.
This easy-to-make recipe takes around 5 minutes and serves up to 4 people.
Teriyaki Sauce Ingredients
For a traditional Japanese teriyaki sauce recipe that can be used as a marinade and glaze, you only need four ingredients:
However, if you’re looking to enhance the taste further, you can add any of the below ingredients:
If you want to use teriyaki only as a dipping sauce, add in cornflour mixed with water for a thicker consistency because without it, the sauce would be too runny.
Preparation Method
Whether you’re making a traditional or less traditional version of teriyaki sauce, the preparation method is simple for both.
Pour water into a small pan and mix all the ingredients together. Keeping on medium heat, stir until the sugar has completely dissolved and bring the sauce to a boil.
To give the sauce that glossy shine and slight thickness, lower the heat and continue to cook for 5 minutes.
If you feel your sauce is too thin and want to thicken it more to be used as a dipping sauce, simply mix the cornflour with cold water and add it in the sauce – cook this further until you achieve your desired thickness.
The sauce can also be thinned with water if it’s too thick for your liking. Once the sauce has been cooked, turn off the heat and let it cool before serving or storing it in the refrigerator.
Homemade teriyaki sauce has a shorter shelf life and is best kept in the fridge and used within a few days or frozen for longer storage. While the shelf life of store-bought teriyaki sauce kept in the pantry is 3-6 months if opened and 3 years if left unopened.
What Does Teriyaki Sauce Taste Like?
Teriyaki sauce is a sweet, tangy and sticky sauce. The authentic, homemade, traditional version of the sauce will also have salty umami undertones due to mirin and soy sauce.
The less traditional version will have the same taste, but with a slight hint of other ingredients included in the recipe, such as ginger and garlic.
Teriyaki Sauce Uses
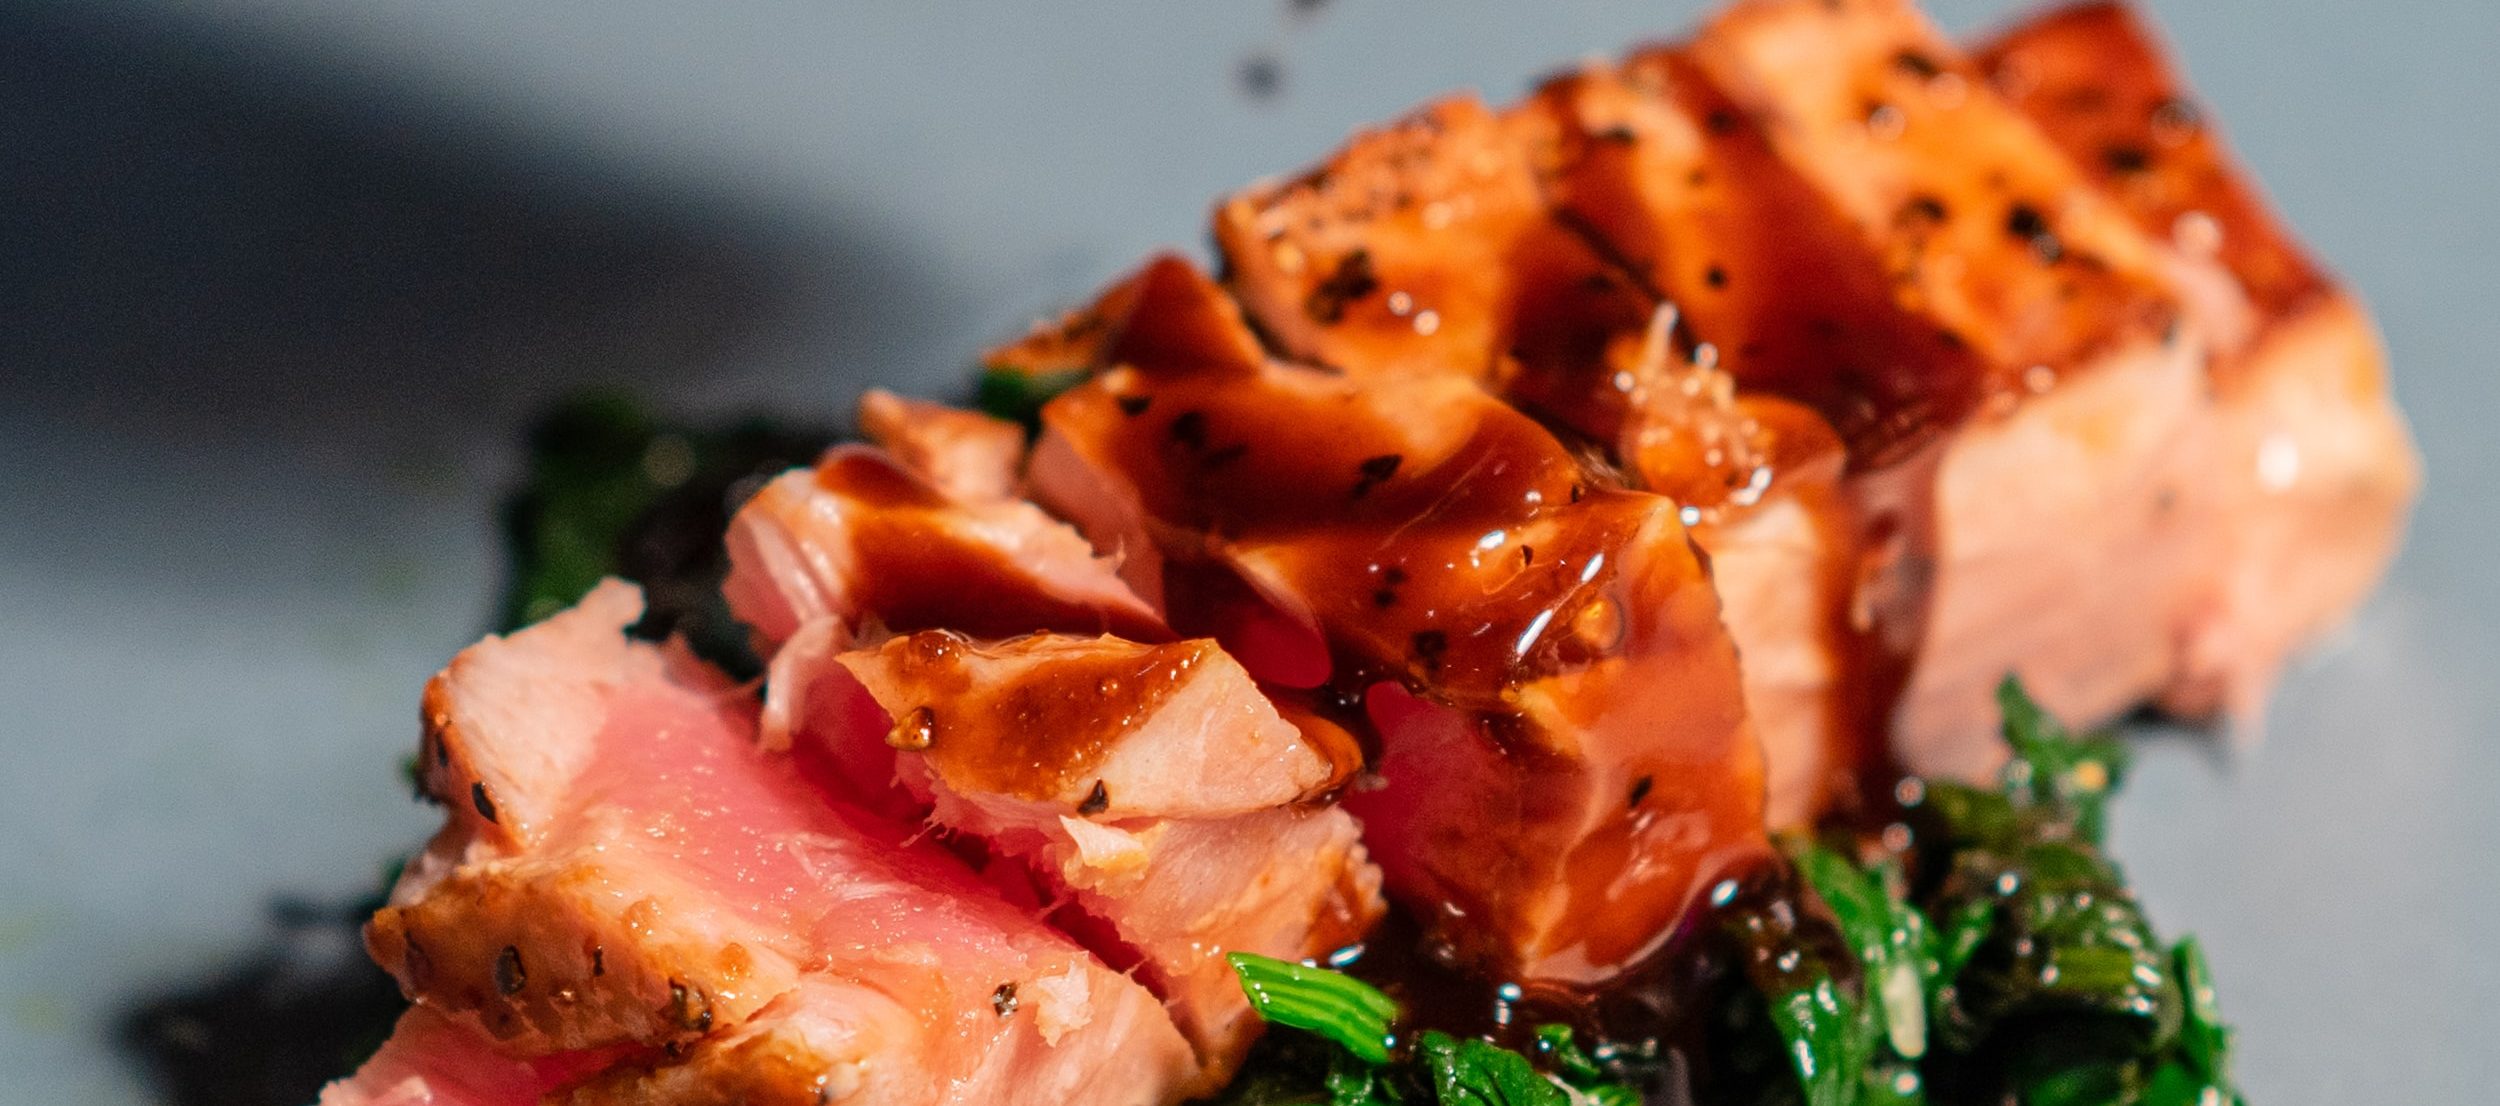
Best known for complementing grilled dishes such as Grilled Teriyaki Chicken and Grilled Teriyaki Salmon, the sauce is mainly used as a marinade or glaze for meat and fish dishes.
The beauty of the sauce is that it can be used for barbecuing dishes such as chicken wings and lamp chops, used as a sauce in burgers, in salad dressings, noodle dishes such as teriyaki chicken noodle, stir-fries such as teriyaki chicken stir-fry and as a dipping sauce for dishes such as teriyaki pot stickers.
Why Use Mizkan’s Honteri in Teriyaki Sauce?
Mizkan’s Honteri, is a mirin-style sweet seasoning, but with lower alcohol levels. Because it contains 0.5% alcohol, it does not require boiling like mirin, so it is quicker and easier to use.
When using mirin in teriyaki sauce, you must boil it first to evaporate the alcohol. With Honteri, you can just add it alongside other ingredients and start the teriyaki sauce making process.
The ingredient is perfect in teriyaki sauce as it adds a complex and rounded sweetness as well as helping to accentuate and balance savoury flavours of dishes.
If you want to find out more about how to use Mizkan Chef products in your restaurants, get in touch with our expert team here.
You can also sign up to our newsletter to keep up to date with all the latest news and trends within the foodservice sector.
When we challenged French Chef, Pierre Sang Boyer, to make a Korean-French fusion recipe with Honteri we were excited to see what he would come back with. As you might expect, he rose to the challenge effortlessly to create a beautiful flavoursome seafood recipe, blending both cuisines perfectly.
About Pierre Sang:
In France, Pierre Sang is one of the most recognisable names in the foodservice industry with a high-profile media presence which stemmed from his first TV appearance as a contestant on French TV program Top Chef in 2011. Since then he has built his reputation as a culinary expert in the French media and is often invited to give his expertise and opinions about French Gastronomy.
Pierre Sang started his career as a baker before working as a chef in Lyon’s Opera. He worked for many Michelin star restaurants in Lyon, Paris and London, before his name became well known within the industry from his appearance on Top Chef. Nowadays, Pierre Sang is giving taste buds a treat with his innovative Korean-French Fusion cuisine across his five restaurants in Paris.
The recipe:
In response to our challenge, Pierre Sang created ‘Seabass en croute with oysters and Honteri gelée served with lemon caviar pomegranate and pickled onions’. Using Honteri as the start point for his imagination, this delicious seafood dish shows how well Honteri works to bring together the various flavours, offering up a masterclass in fusion cooking, blending classic French cuisine with a Korean twist. It is undeniably an elegant dish which would not look out of place on a Michelin stared menu and showcases the versatility of Honteri outside of classic Japanese dishes. Why not delight your diners and re-create this fragrant and flavourful recipe yourself?
For more details about the recipe visit our French Instagram and Facebook pages :
https://www.instagram.com/mizkan_chef_france/
https://www.facebook.com/MizkanChefFR
You can follow Pierre Boyer Sang on Instagram @pierre_sang
Please note this recipe is only available in French for copyright reasons.
We are proud to share the news of our partnership with Top Chef contestant Mory Sacko, who has used his talent and fresh skills to create an exciting new Japanese-African fusion dessert recipe using Honteri.
About Mory Sacko:
Mory was a contestant on this year’s edition of the French TV program Top Chef and has now become one of France’s favourite new culinary figures. With over 120K followers on Instagram in just a few months, not only is Mory popular, he is also hugely talented, blending African and Japanese flavours in a unique way. Mory honed his skills working beside famous Chef Thierry Marx at the Mandarin Oriental, then after Top Chef, he moved on to share his inspired dishes at the Edo restaurant at the ‘Palais de Tokyo’ in Paris where he took residency for the summer season. He is now starting on his own creative path, with the opening of his first restaurant Mosuke (as a tribute to Yakuke, the first black samurai) which opened in September 2020.
The recipe:
Mory has also collaborated with us at Mizkan to create a Pineapple Shiso ‘candy’ recipe with Honteri and lime syrup. This dish is perfect for a summer dessert as it’s light, fresh and has layers of interesting flavours from the combination of ingredients such as citrus seasoning, cacao beans, Sancho pepper and crème fraiche. The recipe showcases both his creativity and the versatility of Honteri moving away from the more traditional take on classic Japanese Mirin recipes.
For more details about the recipe visit our French Instagram and Facebook pages :
https://www.instagram.com/mizkan_chef_france/
https://www.facebook.com/MizkanChefFR
You can also follow Mory on Instagram @mory_sacko
Please note this recipe is only available in French for copyright reasons.